
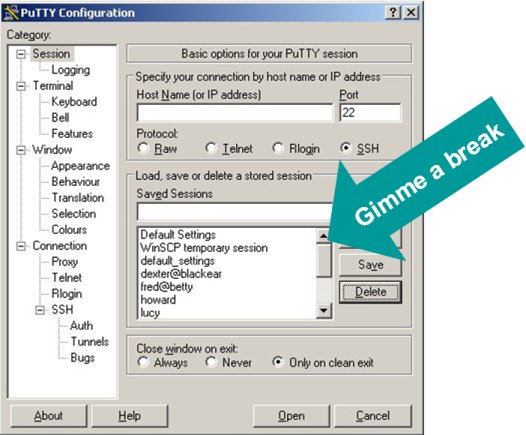
Putty is a great if you only have a handful of servers that you connect to on a regular basis. But as a consultant with a growing list of clients you can rapidly find yourself having to deal with a larger and larger number of servers, and scrolling through that little list of Putty saved sessions can become a nightmare.
Then there’s tunnelling. It’s easy to set up tunnels in Putty, so that you can connect to a gateway and then use that connection to jump to a target server in the client’s network, but connecting is always a 2-step process. You have to hunt for and double-click on the tunnel session, and THEN double-click on the connection for the server you actually want to work on. If you’re using Linux or Cygwin you could write a shell script that would streamline things, but under Windows you’re stuck with a whole mess of clicking.
And here’s another annoyance: suppose you spend hours setting up all your Putty profiles, and then you need to transfer those settings to another computer. It’s possible, but it involves dumping and importing registry keys.
Well, life is too short. Here’s a technique for bypassing these putative drawbacks of Putty. It assumes you
- have Putty and Plink installed; and
- are running Windows.
I assume you have a basic understanding of what ssh tunnelling is and know how to set it up using the Putty GUI. There is a ton of HOWTO’s out there on the subject so I won’t belabour the point here.
No brain surgery is involved. We just write a Windows batch file for every connection we want to make. Then we can categorize these batch files however we like in the filesystem, make shortcuts on the toolbar, the desktop, whatever. The syntax is simple, and you only have to double-click once per connection.
Let’s suppose we want to access a corporate LAN via a gateway:
gateway.foobar.tv
and behind that gateway, there are three servers (not visible to the Internet) that we regularly work on:
dev.foobar.tv
prod.foobar.tv
qa.foobar.tv
First, for this set of servers, write a batch file that defines environment variables that are common to all the connections in the group:
localenv.bat
@set GATEWAY_USER=fred
@set PROD_PORT=3001
@set DEV_PORT=3002
@set QA_PORT=3003
The @ simply prevents these statements from echoing to the screen when they are executed.
The *_PORT numbers are of your own choosing; they are used to bind ports on your own computer to the different tunnels. To get an idea of what ports are currently in use on your machine, do netstat /ar at a command prompt.
Next, write a batch file that will launch both the tunnel and the target server connection together:
prod.bat
(line numbers added for reference only)
[1] @CALL localenv.bat
[2] start “Prod” /b “C:\Program Files\PuTTY\plink.exe” -ssh -l %GATEWAY_USER% -L %PROD_PORT%:prod.foobar.tv:22 -P 22 gateway.foobar.tv
[3] @ping 127.0.0.1 -n 3 -w 1000 > nul
[4] “C:\Program Files\PuTTY\putty.exe” -ssh -l fred -P %PROD_PORT% localhost
Line 1 loads the environment variables.
Line 2 launches a Plink connection in a separate window. Why use Plink? You could have used Putty, but Plink just provides a plain vanilla DOS window that maintains the tunnel whereas Putty is a pleasing interface that you can copy/paste in and customize to suit you. Notice the “start” command, which launches Plink in its own process (kind of like appending “&” to the end of a BASH command).
Line 3 is our way of getting around the fact that the Windows batch language does not by default provide a “wait” or “sleep” command. There are numerous ways to get around this limitation… This line basically waits for 3 seconds while the Plink window sets up the tunnel. You may have to adjust this wait time depending on network conditions.
Line 4 creates your main Putty window.
I trust it is clear from this example how to create dev.bat and qa.bat as well.
Another annoyance is the server will frequently boot you off if you are idle for too long. While there is no command line switch for sending keepalives, you can do this: Set up a new session using the Putty GUI. Go to the Connection section and enter, say, “300” at “Seconds between keepalives”. Don’t fill in anything else, just save the session, give it a name, and then add it to Line 4 of your batch file like this:
[4] “C:\Program Files\PuTTY\putty.exe” -load “default_settings” -ssh -l fred -P %PROD_PORT% localhost
This will send a packet to the server every 5 minutes and (hopefully) keep your idle session active.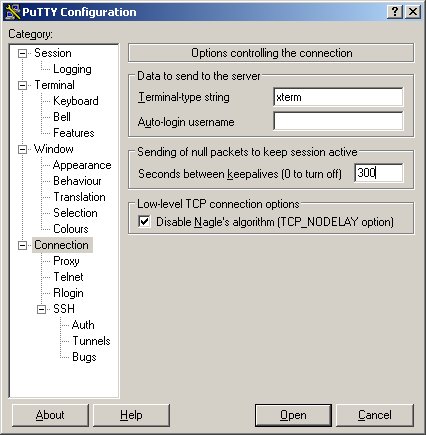
So there you have it. A convenient way to manage tunnel connections with Putty that is easily transportable from one computer to another.